Showing posts with label DINNER. Show all posts

November 17, 2010

MAN, FIRE, FOOD...HEAVEN


Nearly three weeks have whooshed by and the Joshua Tree camping excursion is a misty memory now.  Of course, yesterday evening is a bit misty, too.  Time, however, can not diminish the memory of warm succulent cherry tomatoes bursting on the tongue, the spicy andouille sausages, sweet baby bell peppers and flavor-soaked mushrooms that my knight and I enjoyed from an iron skillet saute invented out of necessity: the necessity of needing to use what we brought so we didn't have to lug  it home!  There's nothing like cooking in an iron skillet over an open fire.  And no, the boys wouldn't eat it.  


First, you need an open sky...


a fire, grate and an iron skillet.  Ours is pretty well seasoned. (* Iron skillets are not washed, but oiled and put in your oven at 500 degrees for cleaning.  The skillet then begins to be seasoned through repeated cooking, oiling and heating which adds to the flavor)


Mushrooms first--they have a lot of moisture and require a lot of time to get that moisture evaporated--and, of course the stray s'more angling for some heat.  Most people wouldn't hear of s'moring until the evening, but not our brood.  


Carrots and sausages next.  Carrots because they are the hardest thing we are using today (need more time than say a bell pepper to soften).  


See the carrots looking softer and glazed, the sausage showing the signs of being well on its way, the mushrooms looking moist and browned a bit...see that?  Now it's time for the jalapenos and mini bell peppers.


Last, but certainly not least, are the organic cherry tomatoes!  We added our veg in stages of hardness.  Our deceptively moist mushrooms went first, though.  Otherwise, those items that are hardest and therefore require more time would go in first, while our tomatoes, the softest, would go in last.  If they all went in at the same time, the tomatoes would disintegrate before the carrots ever got soft.  Thus timing. 


 Then for a large pinch of my Knight's very convenient seasoning mix (sea salt, cracked pepper and red pepper flakes).


Now let it cook.  Moving things around with your fire forks because this will make you feel like your really roughing it (or because, like us, you forgot to bring a spoon of any kind).


Then my Knight, with his resourceful instincts, will rig up some way to get that skillet off the grill and over to...


ummmmhhh...somewhere...how 'bout like a rock. (*note to self: bring hot pads to campsite)


Now for the feast!  And after feasting...


MUST GO CLIMB ROCK!

October 20, 2010

Butternut Squash Soup


I'll just say right up front -- my boys won't eat this.  But it's raining -- sweet rain -- and they want chicken tenders or a hamburger and my over-thirty metabolism would take three months to digest that ground beef patty (not to mention we just had hamburgers last night) and I want something vegetal and fallish?  That's when I'll whip up this simple, fall soup with a crusty baguette and cheese slices, and an arugula salad with chopped pears or apples, pecans, parmigiano reggiano and vinaigrette.  My knight feels like this is not a MAN'S meal--soup and salad--so instead of the baguette, I may do a large man's sandwich aka grilled cheese or I may just remind him about his over-thirty metabolism.

You'll need one of these...


a butternut squash.  Crank the oven on to 400 degrees.  Take out your chef's knife and ...


cut it in half and breathe in that sweet squash aroma.


Scoop out the seeds.  I like to get my hands dirty...but I think you're well within your rights to scoop with a spoon.


Drizzle olive oil on a baking sheet.  Enough to thinly coat.


Lay the squash halves on the baking sheet--halved side down--and slide them into a 400 degree oven.  Now it's time to start the soup base.


Grab an onion, carrot and small russet potato.  Give them a rough chop.


Add about 2 tablespoons of olive oil to a sauce pot or stock pot turn the burner to medium heat.


Add your rough chop and season with salt and pepper.  Turn your burner to medium low, cover and let the veg soften but not brown.  10 -15 minutes.


Soft and easy to poke through with my skewer.  Turn off the heat.


Add a tablespoon of curry - the secret ingredient.  Time to check in with the squash.


My handy dandy skewer pricks the now-soft squash easily.  Flip your halves over...


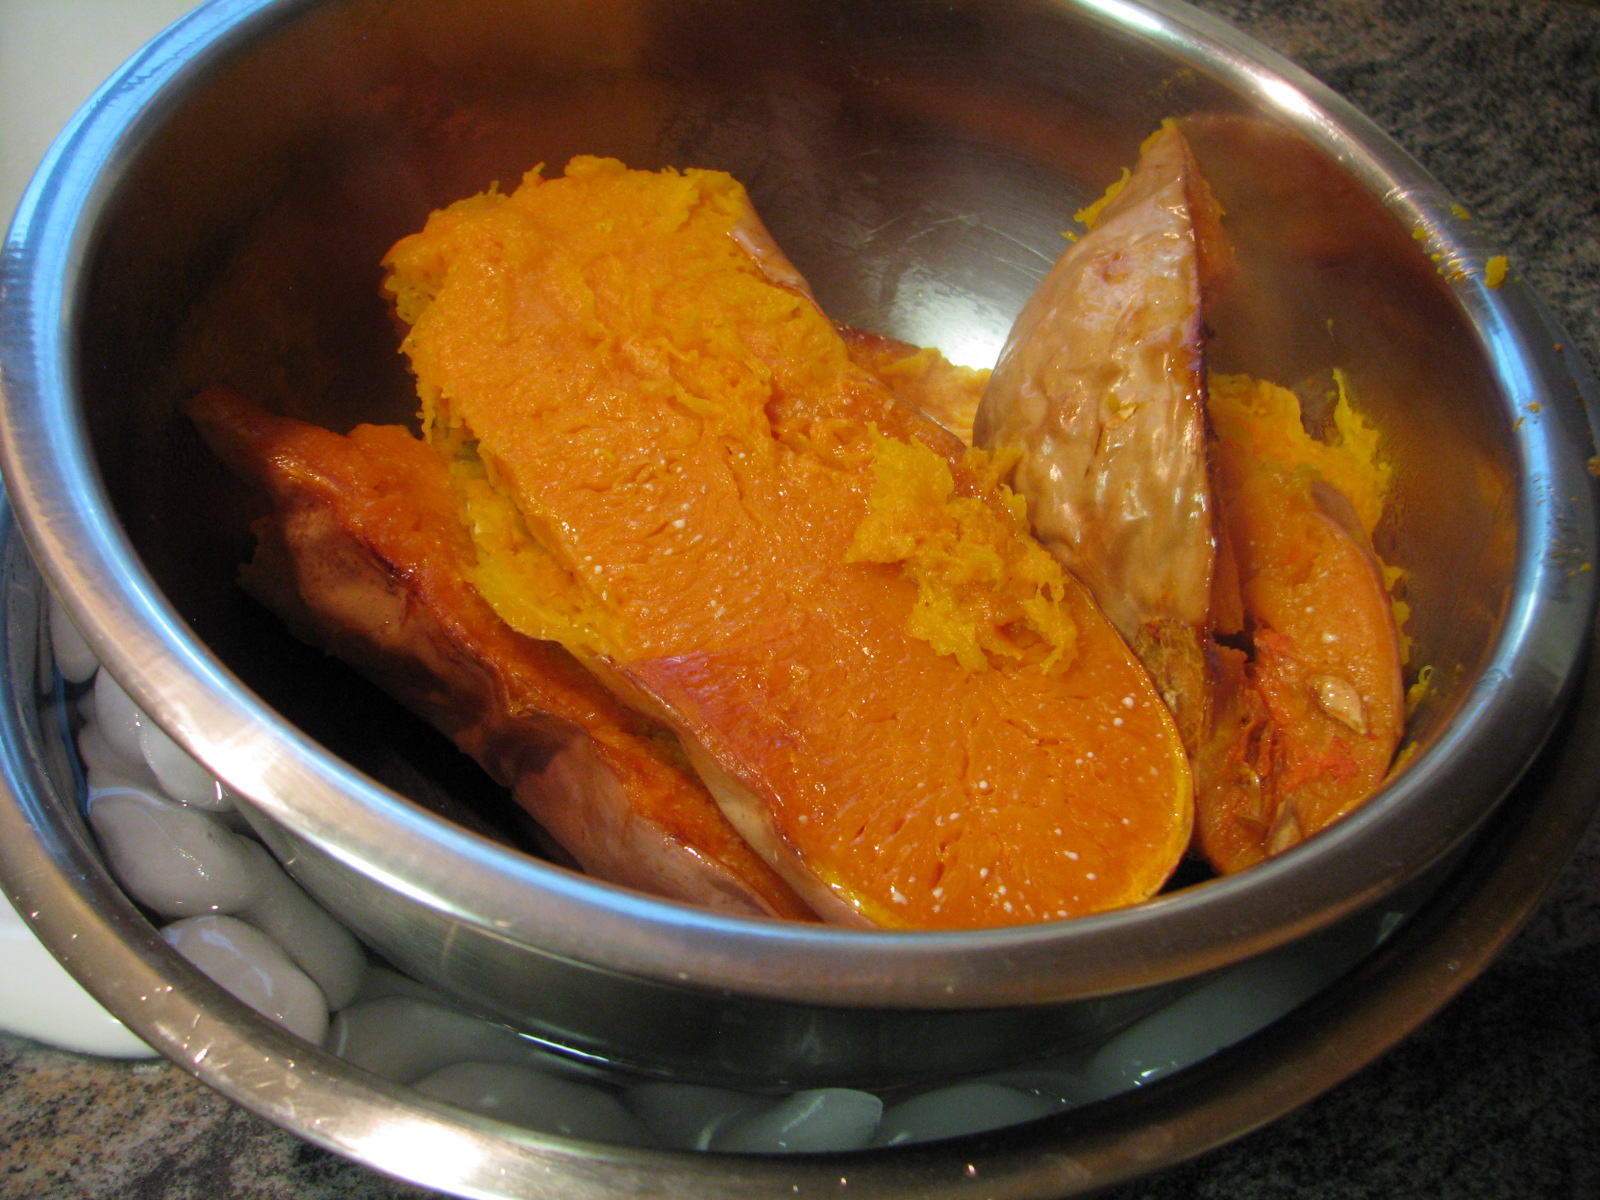
Beautiful!  But HOT...so to cool a little faster I use...


an ice bath.  It's a quick way to cool if you don't have one of those frozen paddles.  So ice and water in one bowl and the squash goes


in a dry bowl, sized a bit smaller, floating on top of our ice bath.  


When the squash is cool, scrape it from the skin with a large spoon.


Add the squash and three cups of chicken or vegetable stock to the pot and bring to a simmer over medium heat.


I moved it all over to a stock pot--it was one big squash.  I let it simmer about 10 minutes, breaking up the squash towards minute 9 with a wooden spoon.  Then over to the...


blender and push puree.  Then back to the...


pot for seasoning and thinning.  Taste the soup.  Is it too thick?  Thin with milk or stock.  Need more salt or pepper?  Add a few more dashes.  


Light a candle, dish it up and enjoy this creamy autumn soup!  

 RECIPE: BUTTERNUT SQUASH SOUP WITH CURRY
*Gluten Free Option / Vegetarian Option

  • 1 butternut squash
  • 3 c. no-msg chicken broth 
  • 1 carrot, peeled
  • 1 white or yellow onion
  • 1 small russet potato, peeled
  • 1 T. curry powder
  • 2 -3 T. olive oil plus drizzle for baking sheet
 METHOD
  1. Preheat oven to 400 degrees F.
  2. Thinly coat a baking sheet with olive oil.  Cut squash in half and lay halved-side down on the baking sheet.  Roast until soft.  40 min. to an hour.
  3. While the squash roasts, heat 2-3 tablespoons olive oil in a stock pot over medium heat.  Roughly chop the carrot, potato and onion (smaller dice, more flavor from the veg).  Add the vegetables to the oil and toss the veg in the pot to coat it with the oil.   Cover and let soften over medium - low heat. 10 - 15 minutes. 
  4. When the veg has softened, add the curry and set aside.  
  5. Remove squash from the oven when ready and let cool.  Scoop squash pulp off of skin and add to the soup base.  Add chicken broth and bring to a low simmer over medium heat.  Let simmer for 10 minutes, breaking up the squash with a wooden spoon.
  6. Pour soup into a blender and puree, blending in batches if need be.  Return the puree to the stock pot.  Season with salt and pepper to taste and thin with milk or broth.  Serve warm.

September 18, 2010

Soccer Saturday and Korean BBQ Sliders


Ahhhhhh Saturday.  The morning sun rises, the foggy marine layer breaks and like any self-respecting SoCal mother, I am sitting at the soccer fields by 8:15 a.m..  Showered and lip stick on. It's my middle dude's game and at this level of play in his league, no one keeps score.  Except, of course, the Horseman, so called because he was born in the year of the horse, and every other little dude playing soccer on that field.  The Horseman (featured above) scored two goals today.  Way to go Horseman!


Then we head over across town to Soda's game with Coach Dad.  At this level, I am happy if he 1) stays on the field and 2) kicks the ball in the right direction.  Here is the highlight:


Soda has spotted an opportunity to score, and he's on it.  I am screaming like a crazy woman with her hair on fire.
He's goin'...

goin'... (I'm getting hoarse now)


he shoots and he scores! "Good job Soda!" I yell, "Next time, kick it in the other goal!"
So it wasn't our team's net.  But whose keeping score-really?
 

So you know how yesterday I said I'd be shredding last night's leftovers from the "Simply Roast Chicken" for homemade tacquitos?  Guess what?  I forgot the kids had a birthday party and we we're all invited. Which means The Good Food Fairy was off the hook for dinner.  We had a fabulous time at our friends house and ate some very tasty sliders (the mini hamburgers) which had a zinging sweet note.  
    

I thought I'd be stealth and do some undercover investigation (I asked the man bbqing) to find out what he put in his ground beef...and he told me a riveting foodie tale about watching his mother marinade short ribs with a traditional Korean marinade -- soy sauce, garlic, sesame seed oil and sugar.  He told me how he liked to see what she marinated her meats with but didn't like her being at home.  I then asked "Why did you not like your mother being home? and he said because in high school a guy doesn't want his mom at home, so he can, you know and I said "hang out?" and he said "yeah, and stuff" and I said, "well that's exactly why your mom was at home."  Of course my boys will never feel that way about me, right?!


 He marinated the ground beef with the traditional Korean BBQ marinade.  Does that mean he mixed it all in and let it sit wrapped in the fridge?  Dang it!  I didn't ask.  The mini patties were barbecued, served up on halved dinner rolls and topped with bacon, sauteed red onions and crumbled blue cheese!  Ohh la la.  After a day on the soccer fields the Korean BBQ sliders hit the spot.  The Good Food Fairy will just have to fly on to tomorrow where left over roast chicken will be waiting for it's tacquito transformation. 

September 17, 2010

Simply Roast Chicken

(*Prep time: 20 minutes; Cook time: 1 hr and 30 min.)

Not only do the boys love this dish, but this golden delicious bird is the gift that keeps on giving or the dinner that keeps on dinnering.  Tonight we feasted on chicken with warm tortillas, pico de gallo, grated cheddar and corn on the cob...tomorrow, I'll shred the left over meat and serve up some homemade taquitos with Spanish rice and guacamole!  And if I really have it together (no guarantees), I'll make some stock for an Italian stew.  We'll see where we're at with life on Sunday--it might be a frozen pizza.


First, locate an 8 x 8 glass baking or corning ware dish. 


Get the salt ready.  We're going to be massaging this chicken and our hands will get dirty, so it's best to have salt standing by in a small bowl accessible for double dipping.


Then go for a short stroll in the beautiful morning sun and pop in at your friend's house.  Have a short, pleasant chat with her and pick some lemons together.  Or, you know, go for a short drive in the beautiful morning sun an pop into the store and buy a few.  Either way, we need lemons.


O.k. Let's get down to business.  Preheat the oven to 350 degrees.


And here is our pretty roaster. A roaster is a chicken between 3 1/2 and 7 lbs., about 8 months old and has a higher fat content than a fryer.  More fat, more flavor.  Now don't wig out, this is all in relative chicken terms.  Rinse it inside and out.


Pat it dry.


Start the chicken on its oil rub down.  I use techniques I gleaned from a past infant massage class.  Works like a charm.  Rub oil all over the skin--top and sides.  Use your fingers to scissor under the skin, stand the chicken on its neck end and pour oil underneath the skin. 


Using sea salt, we're gonna sorta brine the chicken without all that soaking in salt water stuff.  Rub salt all over the skin and under it directly onto the breast and thigh meat .


Cut two lemons in half.  Squeeze lemon juice all over the skin and again, underneath the skin. The acid of the lemon juice is what makes the skin of the chicken brown so nicely.


Cut a third lemon into eighths and stuff em' in.  Now our bird is ready for the oven...


in it goes, 350 degrees for 1 hour and 30 minutes give or take.  If you have a convection fan, turn it on.  It will circulate the warm air for even roasting and faster cooking.


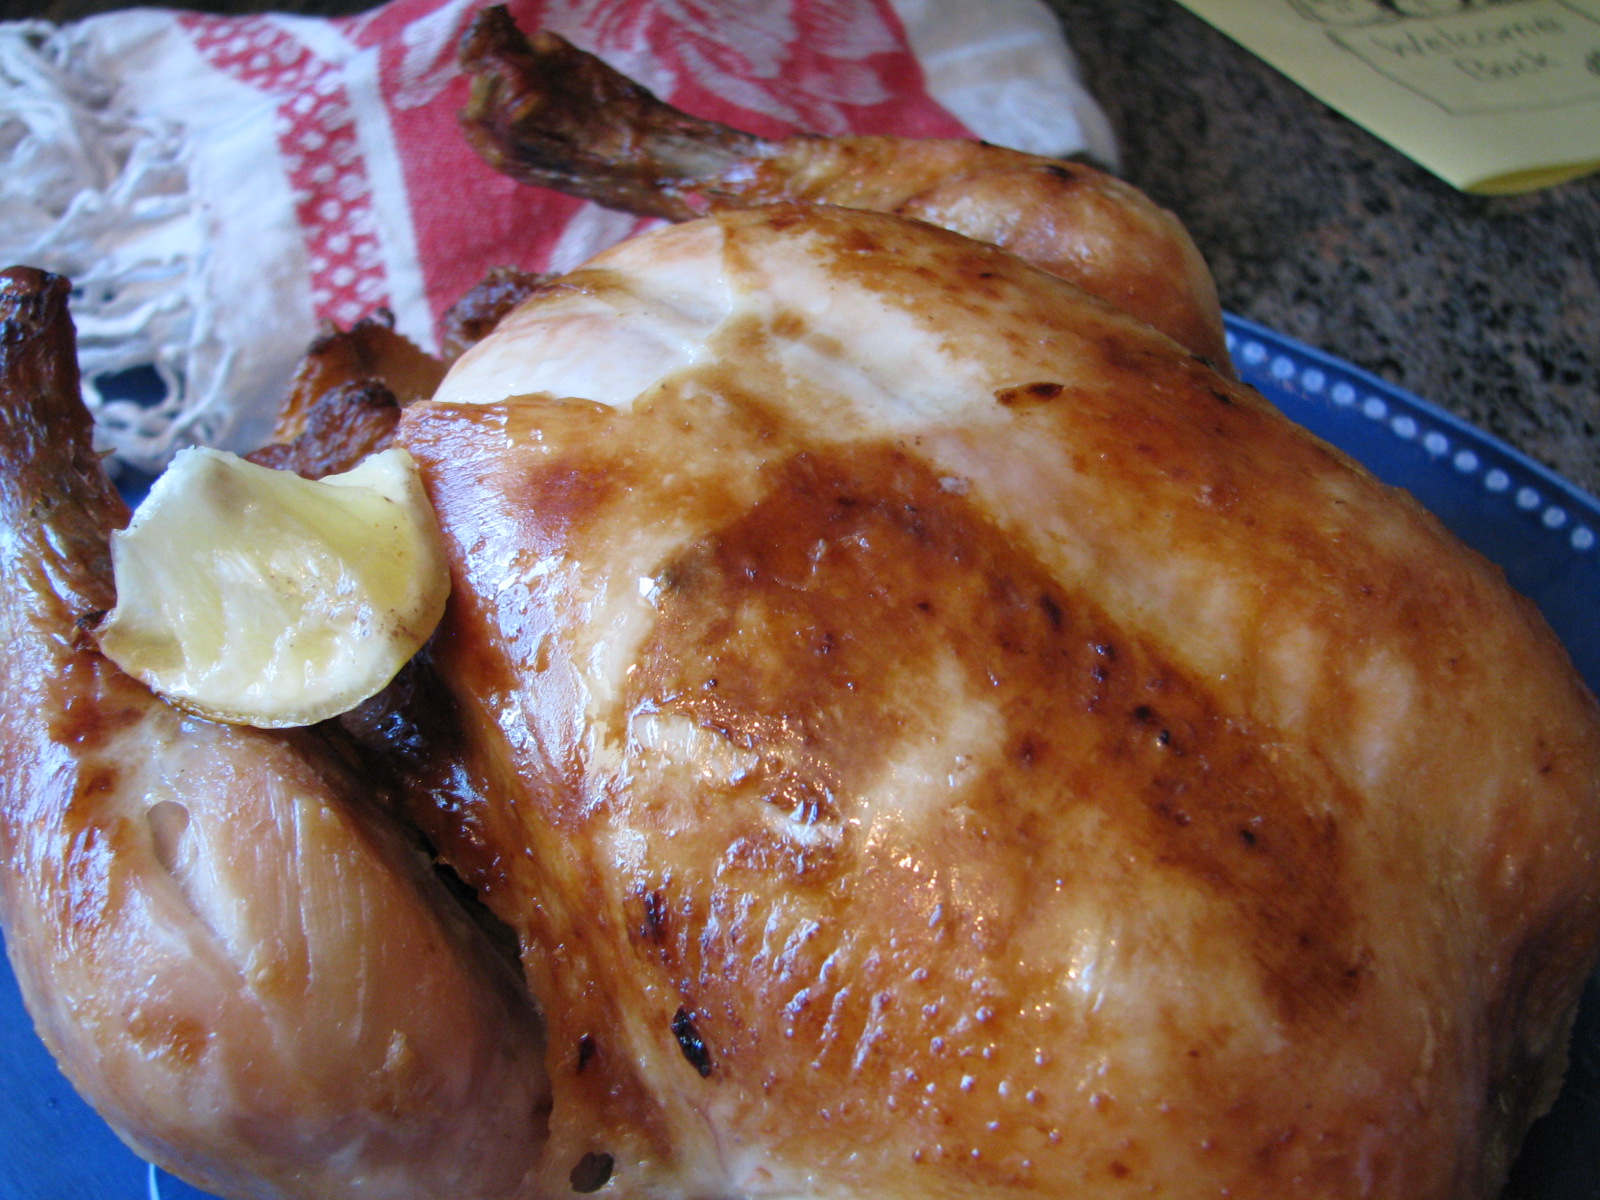
When that beautiful aroma of roast chicken starts to waft through the house, go ahead and take a look.  It should be about 15 to 20 more minutes. Check for doneness clear juices by poking in between the breast and thigh. Yummy juices will trickle out.  Are they clear?  Yes?  Then it's time to come out of the oven. (160 degrees on an instant read thermometer)  Cover with foil and let the bird rest for at least 15 minutes.  By letting the bird rest, it will relax and reabsorb some of its juices.

Ring the dinner bell...it's time to eat!

RECIPE: SIMPLY ROAST CHICKEN
 *Gluten Free option
Prep time: 20 minutes
Cook time: 1 hr & 30 minutes

  • 4 - 6 lb. whole chicken (organic or free-range if possible)
  • 3           lemons
  • 2 - 3  T. olive oil (or as needed)
  • 2 - 3 T. kosher or sea salt (or as needed)
METHOD
  1. Preheat oven to 350 degrees F.  Locate a glass or ceramic baking dish that snugly fits the chicken.
  2. PREP CHICKEN: Take the chicken out of its packaging.  Remove the neck and giblets from inside the chicken. RINSE the chicken thoroughly inside and out.  Place the chicken in baking dish and pat the chicken dry with paper towels.
  3. Massage the the skin--top and sides--with roughly half of the olive oil.  Finger your way underneath the skin of the chicken, scissoring  to separate the skin from the meat.  Rub the remaining olive oil under the skin--over the breasts and thighs--and inside the cavity.
  4. Massage the skin --top, sides and underneath--with the salt.  Rub a large pinch of salt in the cavity as well
  5. Cut two lemons in half and douse the skin--top and sides, and along the rim of the chicken's cavity.  Stand the chicken on its end and, holding the skin open with one hand, squeeze lemon juice over the breasts and thighs underneath.
  6. Set the chicken, breast side up, in the baking dish.  Cut the a third lemon into eighths and stuff them into the cavity of the chicken.
  7. Roast for about 1 hour and 30 minutes (with convection on for even roasting).  Begin checking on it when you smell the chicken's roasting aroma.  
  8. The chicken is finished roasting when it's juices run clear with no trace of pink.  To check juices, poke the chicken's skin with a paring knife or skewer between the thigh and breast.  Juices will spill out, they should be clear.
  9. Cover the chicken with foil and let it rest and reabsorb its juices for 15 minutes.
Serving ideas: 1) Warm tortillas (corn tortillas for Gluten-free),  pico de gallo and shredded cheddar; 2) Brown rice and Italian green beans; 3) Mashed potatoes and spinach salad.