September 27, 2010

TORTA di MELE

Are there times in the year, when you experience the sensation of something excitingly beautiful--say the blue light of a wintery dusk, the sight of dry golden grasses in late September,  the first press of  hot sun on your arms in May, a perfect breeze through the kitchen window after being over a hot stove--and it transports you to another place?  For me, I'm Lady of the manor on gray, drizzly days and I'm back in my childhood home on cool Sunday's in the fall.  But in the Spring / Summer transition...I miss my future villa in the Italian countryside.  Who doesn't?  So this cake helps me to be there, in my villa, baking in the late morning after going to pick veg from my extensive Tuscan garden overlooking a valley, it's river and the walls of Siena to the south.  The moist, pudding-like texture turns out wonderfully as well with gluten-free flours.  Below, I've posted both versions of the recipe--gluten-free and All Purpose flour.


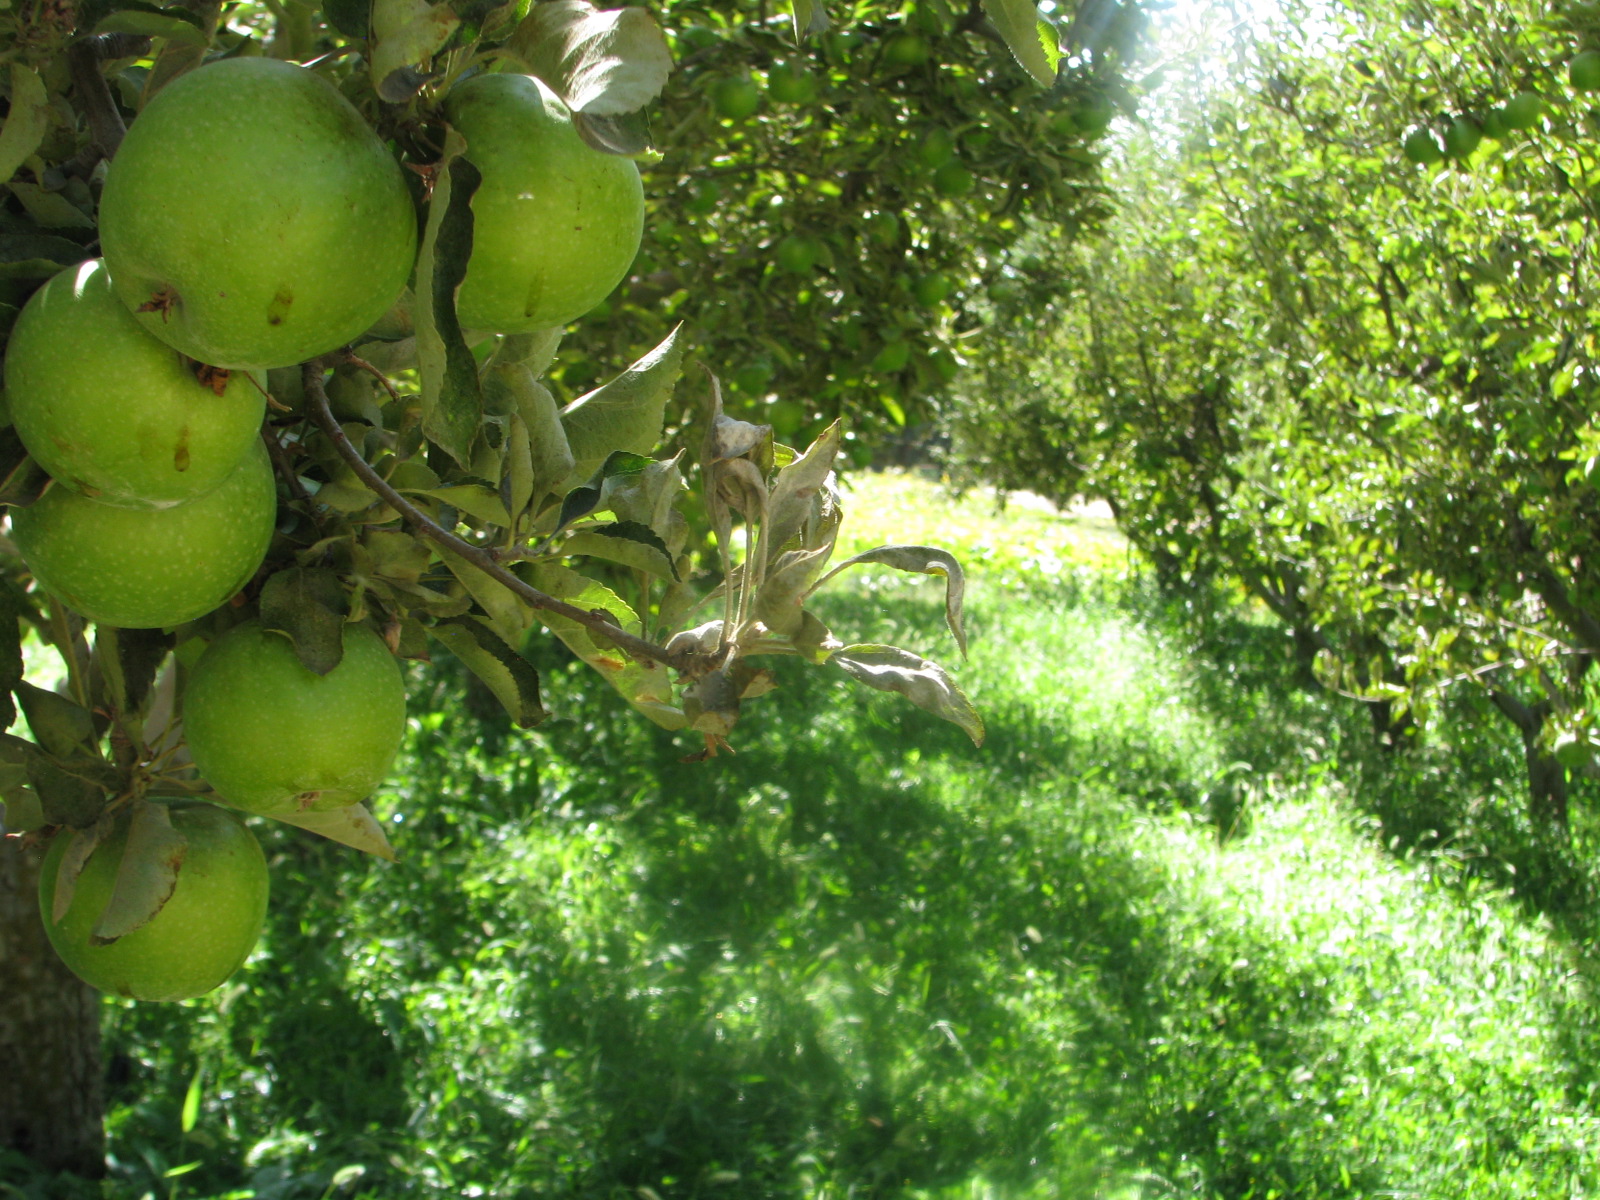
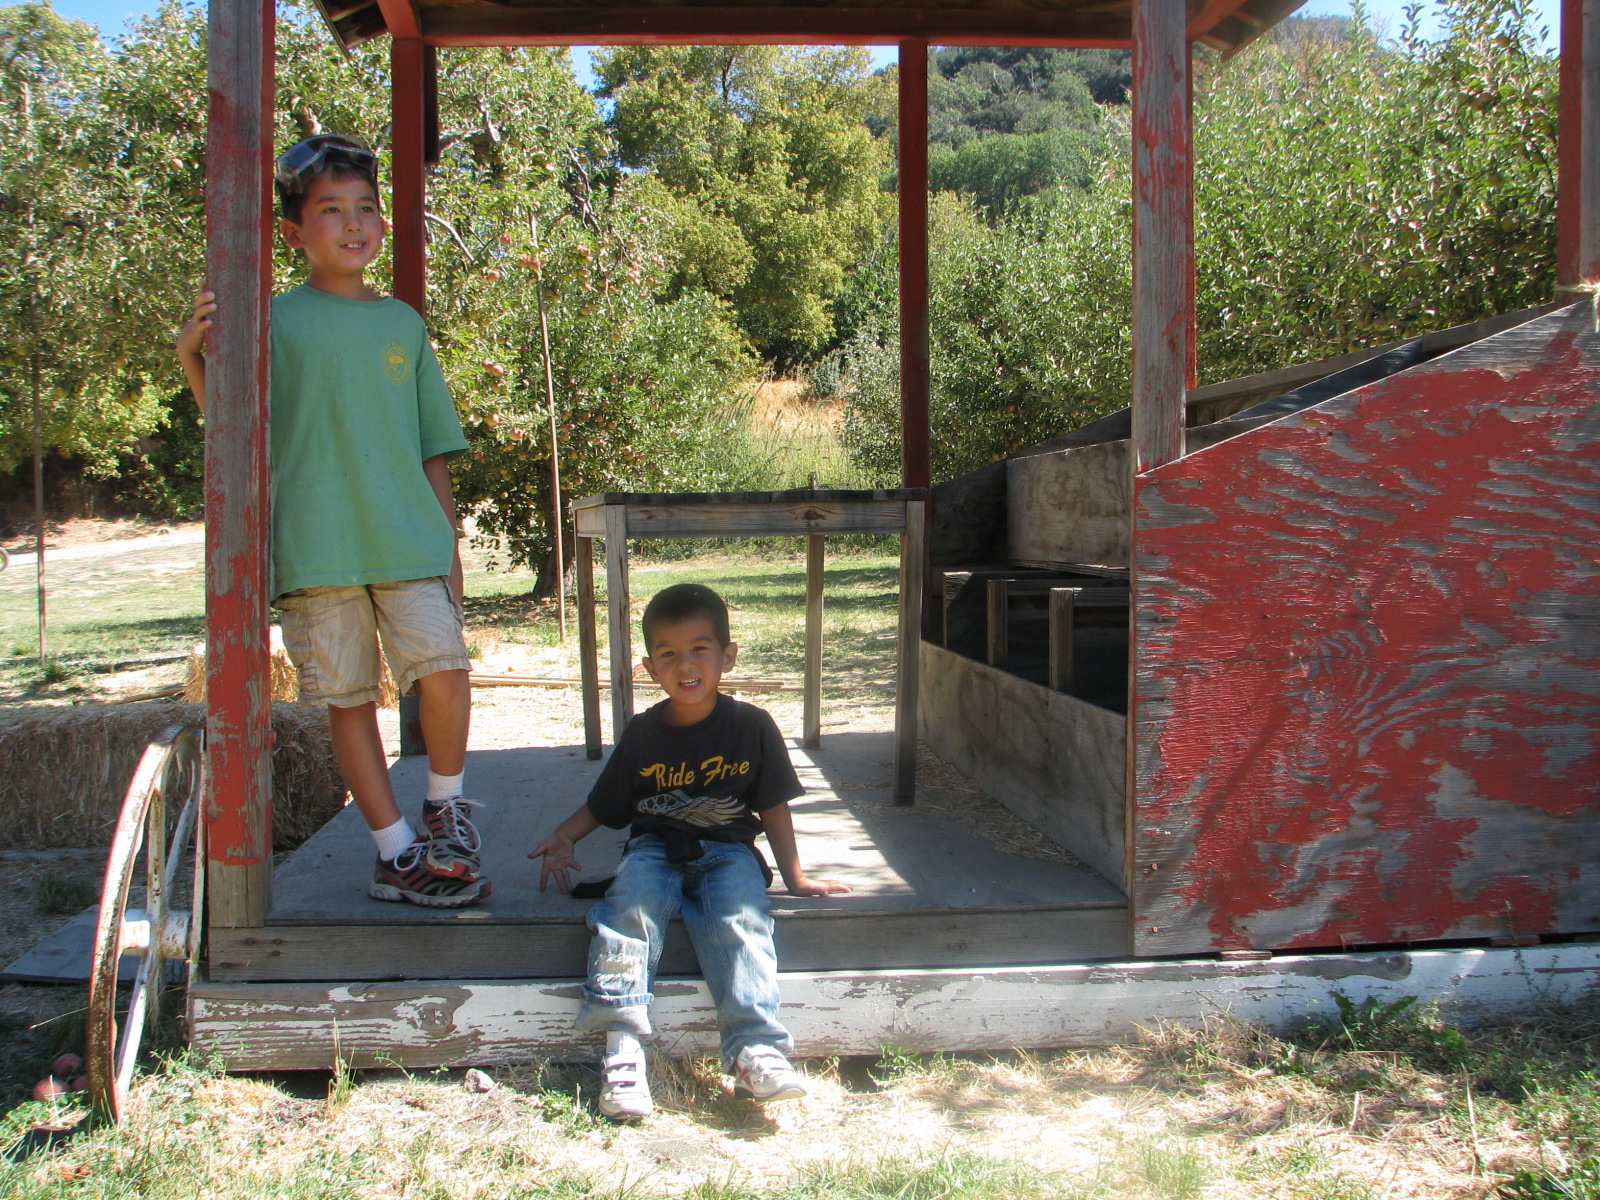
You need five apples.  I'm using the galas and senshus the boys and I picked at Riley's Farm.


Preheat your oven to 375 degrees and butter and flour an 11 inch cake pan.  I used this stoneware pie dish I found, because in my villa, I don't have a lot of cake pans to choose from.


The apples should probably get a rinse off.


Then a  photo op...


Pretty little apples!


Alright, back to work...


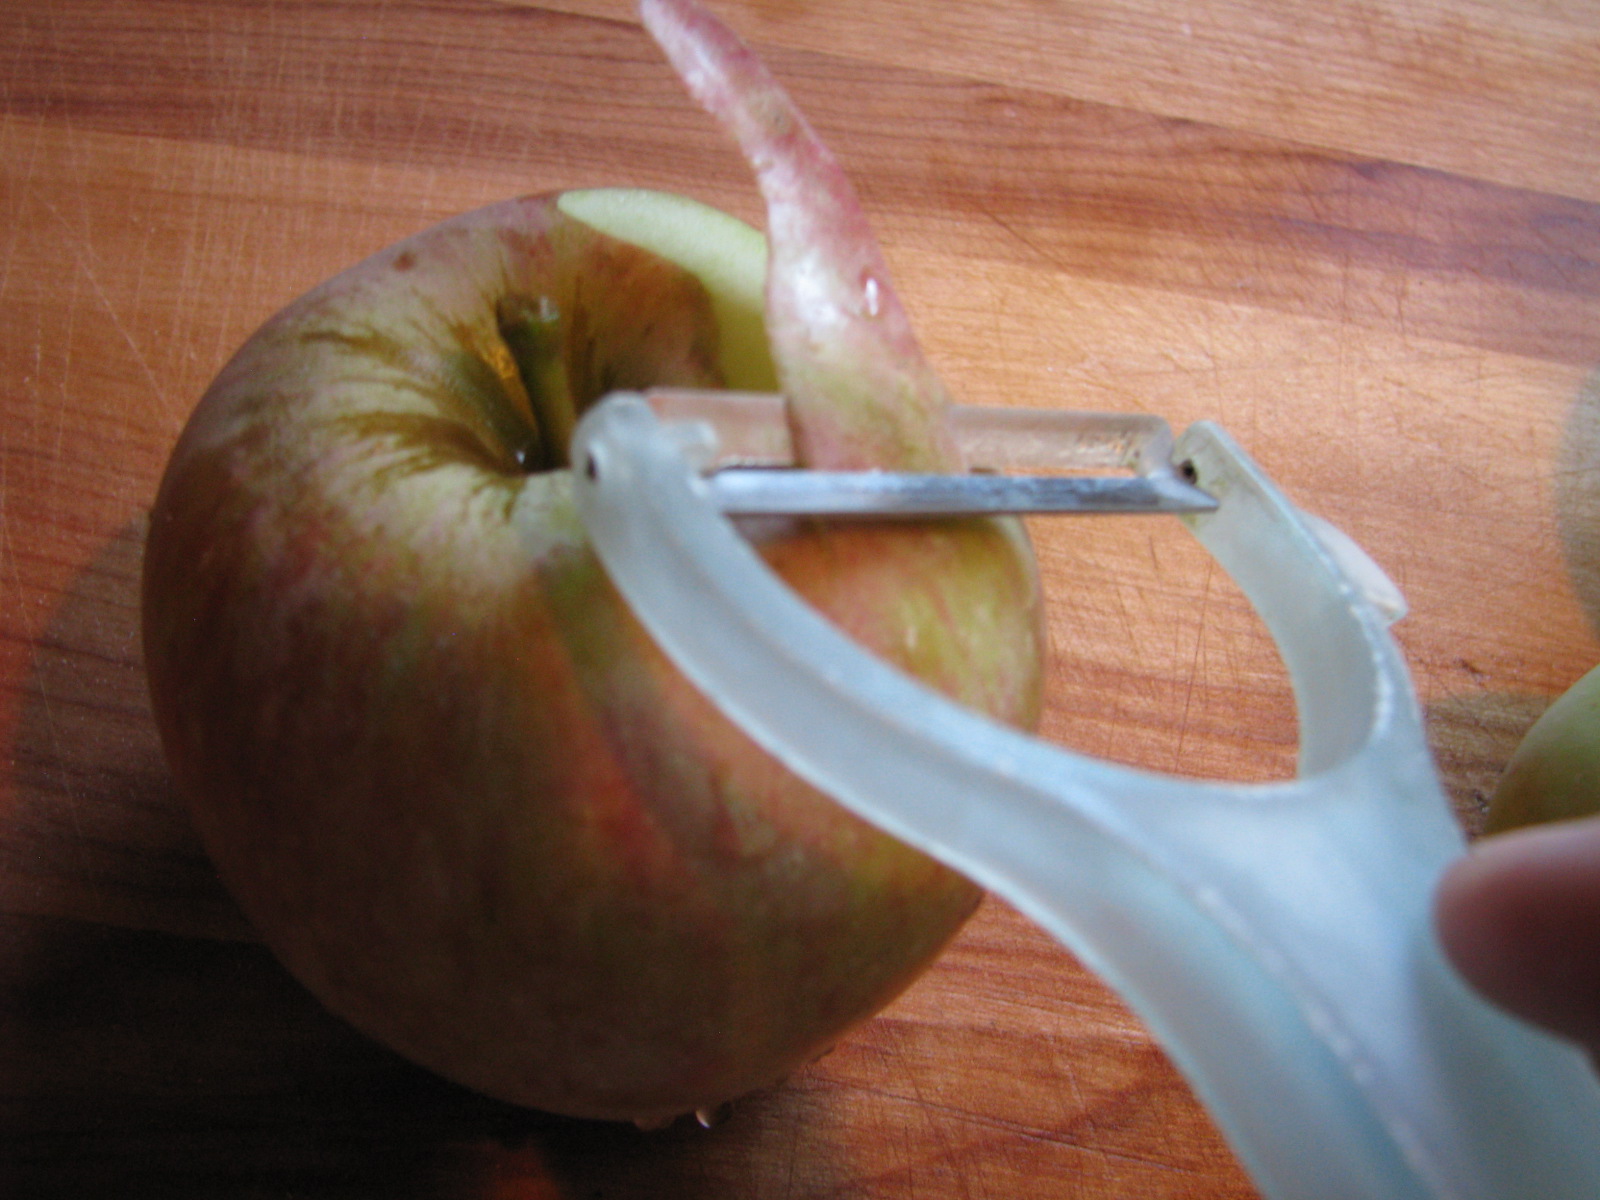
Peel and core the apples.  NOTE: the boys have carried off my apple corer to some fate worse than death out in the swamp.  


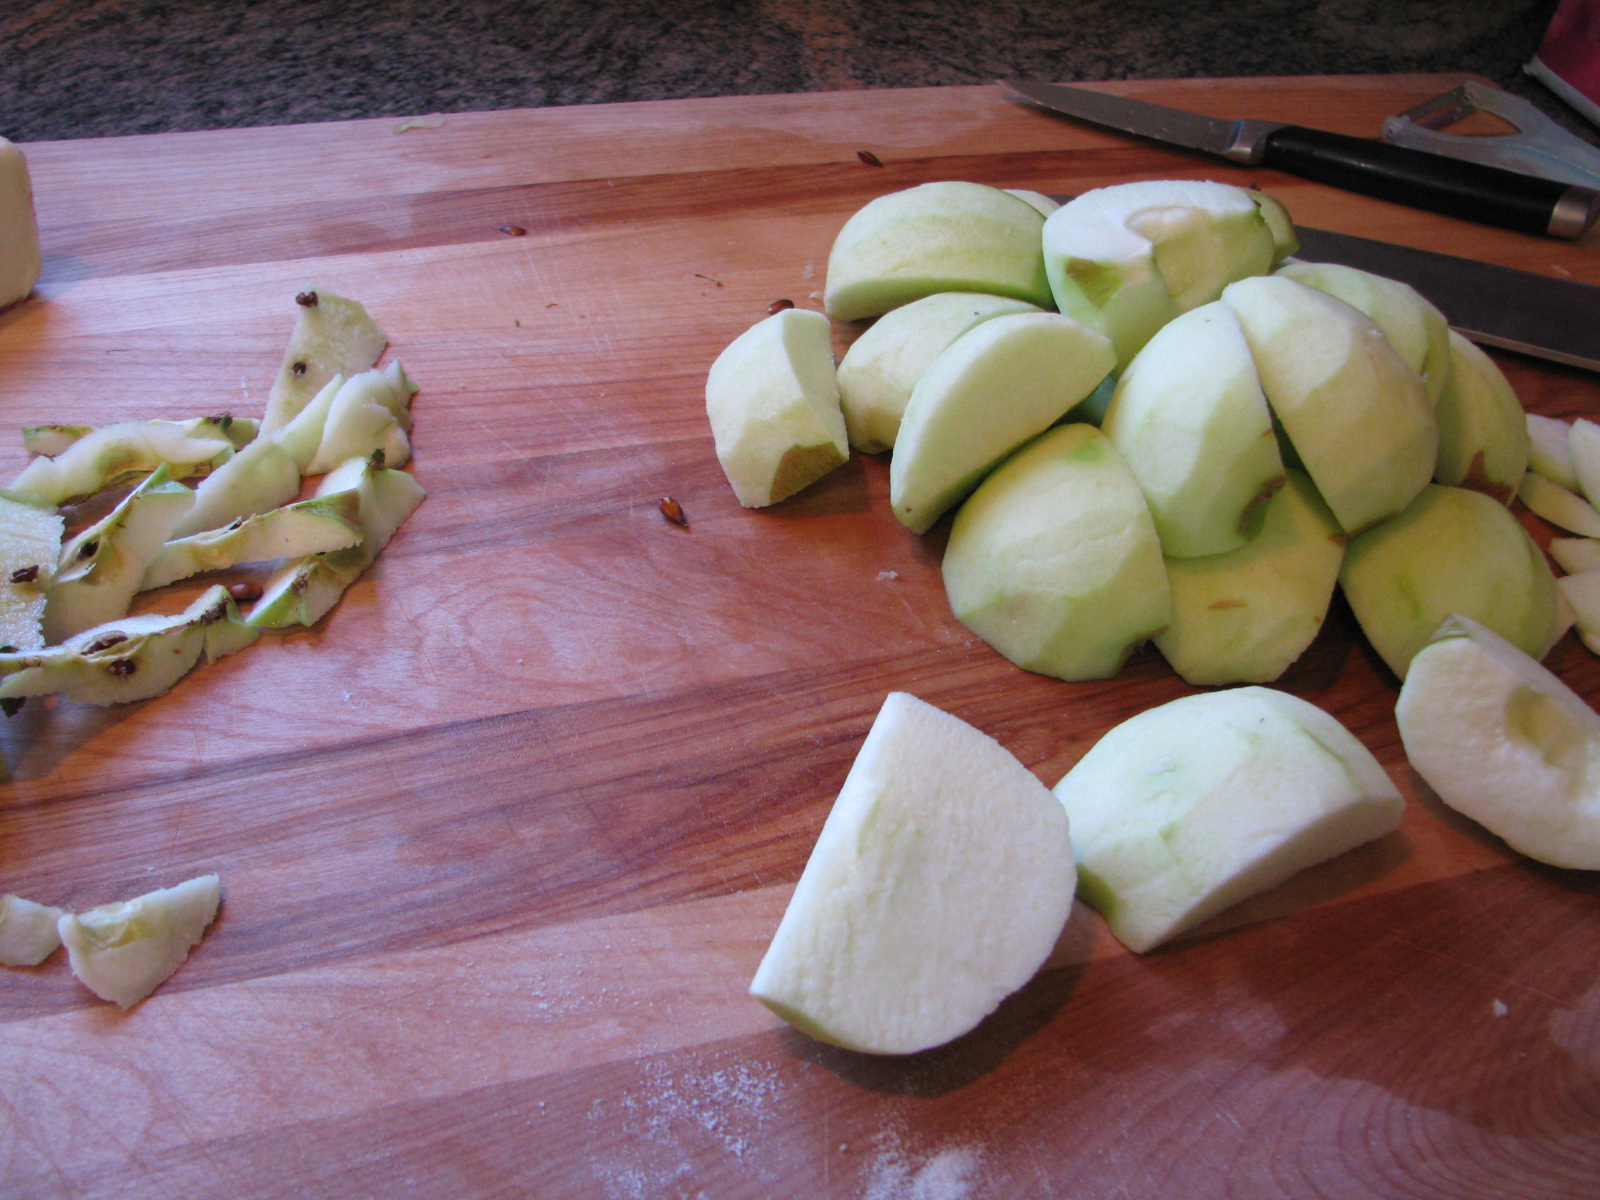
Quarter your cored apples.  I will improvise with a paring knife...


Slice the apple quarters into thin slivers. Apples are prepped so set aside.


In a mixing bowl add 1 1/4 c. sugar -- not flour, but sugar.

2 eggs...


And whisk it together.


Add a 1/2 c. of brown rice flour.  A teaspoon of tapioca flour and a teaspoon of potato flour. (or 1/2 c. of  all-purpose flour for you non-gluten-free peeps) and whisk.  Then add the milk, butter and vanilla.  whisk thoroughly.


Stir in the baking powder quickly and fold in the apples with a rubber spatula.


Pour mixture into the prepared cake pan.


Place the cake on the floor of your oven or the lowest rack for 10 minutes.


Move it to the center rack and bake for 30-40 minutes if using gluten-free flours or for 50 minutes if using A.P. flour.


When the toothpick, or skewer in this case, comes out clean, it's ready.

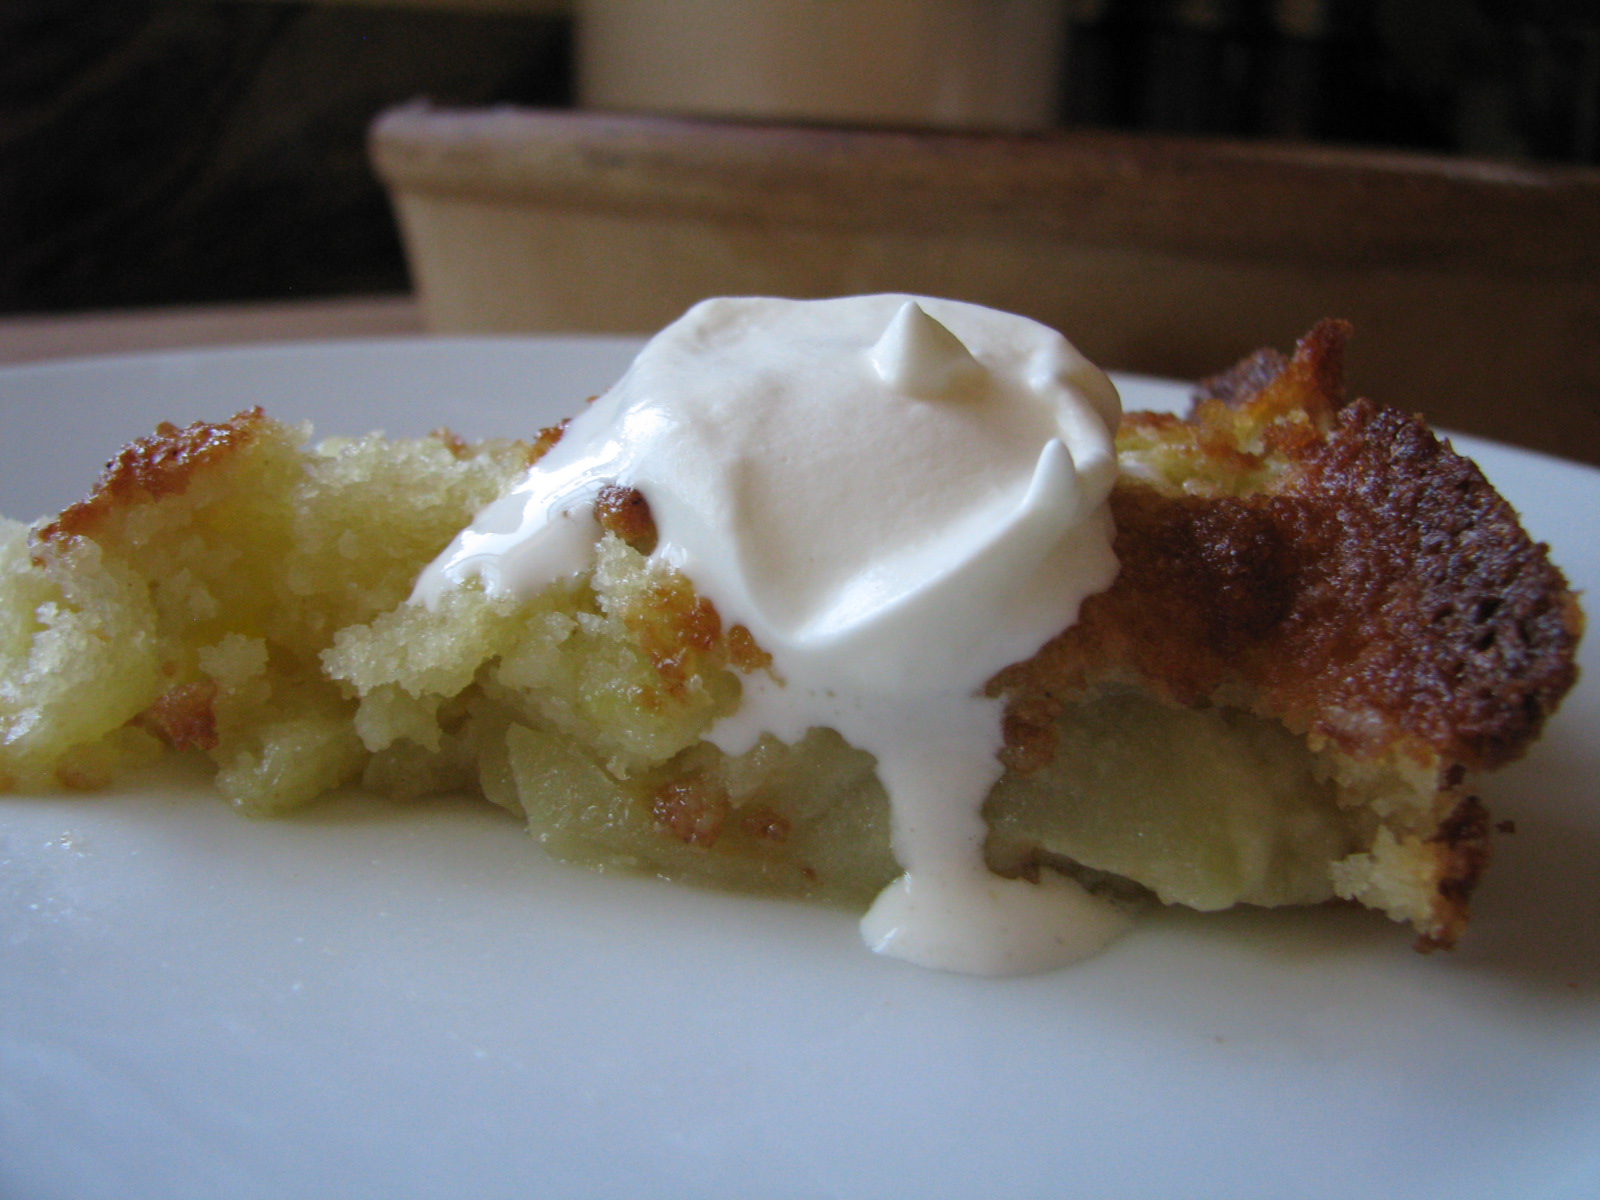
Aaaaaahhhhhhhh!  The Knight and I eat this for breakfast, afternoon snack, pre-dinner and after dinner.  Then go for our three mile jog. (I made the last part up)
RECIPE: GLUTEN-FREE FARMHOUSE APPLE CAKE
(from The Four Seasons of Italian Cooking)
makes 11 inch cake

  • 5           apples
  • 2           large eggs
  • 1 1/4 c. sugar
  • 1/2    c. brown rice flour
  • 1 t.         tapioca flour
  • 1 t.         potato flour
  • 1/2 c.     whole milk (I've used 2 percent or almond milk)
  • 7 T.        butter, melted (or non-dairy substitute)
  • 1 t.         vanilla extract
  • 2 t.         baking powder
METHOD:
  1. Preheat oven to 375 degrees.   Butter and flour an 11 inch cake pan.
  2. Peel, core and quarter apples.  Slice crosswise into thin slivers.  Set aside.
  3. Whisk eggs and sugar in a large mixing bowl until sugar is dissolved.  Stir in either the GF flour blend or your all purpose flour.  Then whisk in the milk, butter and vanilla until well combined.  Quickly stir in baking powder and fold in the apples with a rubber spatula.
  4. Pour the mixture into prepared cake dish and bake on the flour or lowest rack in the oven for 10 minutes.   Transfer the cake to the center rack and bake 30 to 40 minutes for GF cake or 50 minutes for AP flour cake.  When the cake is golden brown and a small paring knife or skewer comes out clean after poking it in the middle, remove to a cooling rack to cool. Serve with a dollop of whipped cream or ice cream.
RECIPE: WHIPPED CREAM

  • 3/4 c.   heavy cream
  • 2 T.      granulated sugar
  • 1 t.       vanilla
METHOD
  1. Add cream sugar and vanilla into a a chilled bowl.  Mix with beater until soft peaks form.

September 26, 2010

The Journey: Part II

So I had quit my job and told my husband that we would have to make it work financially, because I needed to be at home to help our oldest son, who had just received a diagnosis of mild autism. I tackled one symptom at a time.  My first goal: helping him learn how to talk.

Boonie was just 2 1/2 years old when we went to our first appointment with the speech therapist.  At first he was frightened and clung to legs, crying.  I felt a little embarrassed every where we encountered people--the supermarket or the park--because he did not stop to look, speak or respond to anyone who might say hi to him. I would smiled and say something like: "You know boys."  The truth is, I didn't know why he seemed to be zoned out, uninterested.

But as I checked in with the office secretary, one of the therapists slowly crawled on the floor up to him pushing a small truck.  Then she stopped a foot short of him and pushed the truck gently towards him.  Then she backed away quickly playing shy.  A game somehow materialized out of this wanting to share the truck but playing shy with him and he relaxed, tuned into her and the car. I felt a sense of relief, like I could take a rest from an inexplicable burden I had been carrying and let these wonderful people lighten the load and teach me how to better carry it. I felt like I had come to a designated check-in point appointed for my journey as a mother to Boonie.  We were in the right place.

I didn't know what to expect in a speech session, but it turned out to be a magical place.  I remember at one of Boonie's first sessions, the therapist had a large bead and wire toy.  You know those toys that look like someone took an abacus and curled and twisted all of the wires so that a child can push the beads up and down along the curls of the wire.  So she would push six of those bead up the wire, saying: "Up, up, up, up, up, up, up," until the beads reached the top and then she would wait.  Let silence surround us on the floor, building suspense.  Then: "Down!" she'd say and let all the beads go crashing down.  She did this a few times sitting on the floor with Boonie and really dramatizing the ups and downs until he would wait in great anticipation for those beads to crash.  After several repeats of this she changed it slightly and here's where the magic happened.  She up, up, upped the beads and waited...and silence.  Then in the silence, a little utterance popped out of my little boy's lips  "Dow-!" and she released the beads and to his delight, they all came crashing down.  He laughed and laughed and then she asked: "More?" while simultaneously signing "more" and he signed more and she did it again.   This was the first time he had tried to say "down."  The first time.  He had two other word-sounds at that time: Ba (ball) and Ma (mom).  These therapists were miracle workers for us. 

We went to speech twice a week.  The therapist engaging Boonie the entire session and through play, eliciting intelligible noises.  Words.  Response.  And then I would drive him home and do everything I saw the therapist doing with him on our floor at home.  Having this direction to go in with Boonie and the new tools thrilled me and showed me what I needed to do.  Knowing what he needed me to do to help facilitate his development gave me hope and I began to feel comfortable in my new identity as a mother..

Part of not being able to talk, however, means tantrums.   He had no other means of expressing "NO!" that two-year-olds are infamous for and also, children with sensory processing problems, you can't always tell what the tantrum trigger is.  It wasn't long, before the therapist took us into a different room for our session one day--a small and plain room.  A boring room.  A little-bit-dinge room. He began to scream and pound the wall.  I did not know what to do with him under the circumstances.  The therapist told me that we were not going to let him get away with that and then she taught me a tool I will never forget and that I have used with all of my children.  She said: "Hug him snugly from behind and face a blank wall.  Count to ten, or if you need to, to fifteen or twenty.  Then ask him, 'Are you ready to try again.'  Looking at that wall is going to be boring and he will not want to keep looking at it.  Holding him in an embrace gives him some sensory input (firm touch) that will make him feel safe.  But you have to be consistent.  Even if you are at the supermarket, you cannot be embarrassed, you have to take him out of the cart and find a blank wall and count.  If he cries after you've counted, start counting again until he's ready."

I took her advise.  It was the only sound advice I had received on tantrums and you know what, it worked.  It took only two or three times in the store in conjunction with using the wall technique consistently at home, until he figured out that tantruming was going to lead him to a blank, boring wall.  I realized when small children, or any of us for that matter, are unable to cope with the circumstances and resort to a tantrum of some kind, giving them a firm, consistent safe boundary calms them and helps them learn how to cope with uncomfortable moments in life in a rational way.  You have trained them that tantruming is not an option. 

To be cont'd...

September 24, 2010

Parent Develpment # 1: The Witching Hour and Movies


Let me describe to you the scene at my house at five o' clock in the afternoon: the boys are hungry.  Climbing up pantry shelves, dropping chocolate chips on the floor,  gummy vitamins are being passed around,  yeast strewn all over (its empty package abandoned on the kitchen counter), popcorn starts popping in the microwave and raisins, chips, frozen blueberries and mochi balls are are being pulled from the freezer and floated around to all the kids in the yard as well.  In short, it's mayhem. This is the witching hour. 

PRE-SITUATION: GET CONTROL.  Send the neighbor kids on home to dinner.  Bring all of my own kids inside.  Wash hands, clean-up.


SITUATION # 1: I need to buy some time to make dinner.   Snacks in this situation are not an option.  It would fill them up enough so they wouldn't eat dinner, but leave them starving as soon as dinner has been cleared up and put away.

SOLUTION # 1: Redirect the children to an apple, orange, banana or carrot.  Look at it as an amuse bouche.  It wets their palate, but does not fill them up. Ok, so it is a snack, but a healthy one.  It buys you time.

Now I've decided to do chicken tenders and homemade potato chips.  Won't take long, maybe twenty or thirty minutes.  This is when I turn around from taking stock of the fridge and see Soda, my three-year-old who is still in the hunter-gatherer phase, squatting on the floor eating from a bag of fortune cookies he found from the counter top array.

SITUATION # 2: The kids are still hungry.


SOLUTION # 2:  "EVERYONE TO THE COUCH.  WE'RE PUTTING ON A MOVIE!"

The movie is something you fight within yourself everyday.  There are the brain development studies; there is your personal ideology that America's problems today are a direct result of moving too far from how it was on the farm (Philo Farnsworth notwithstanding, no TVs on the farm);  there is lethargy and obesity and laziness AKA the "couch potato" syndrome to worry about.  You must therefore use the movie sparingly and use discernment in choosing.

So to rate a movie for your children ask yourself these questions:
 Yes = thumbs up
1) Is it educational on some level? 
2) Does it have music?
3) Is the animation tasteful on an artistic level?

Yes = thumbs down
1) Is it dumb?

That pretty much sums it up.  Use movies only when you absolutely need to--to prep dinner last minute, have an intense conversation with a drop-in friend, or write that novel you've been meaning to.  The danger of overuse with the old movie solution is that the novelty of it might wear off.... Then again, knowing my kids, it may not.  Good luck.  Choose wisely.

*GF Chicken Tenders and Homemade Potato Chips coming soon

September 23, 2010

"MAGIC" MOMENT # 2: FIRST DAY of FALL


So I decide to take the boys on this, the first day of Fall, on a field trip to the apple orchards of Oak Glen.  Temperature: 85 degrees Fahrenheit.  Car: Honda Pilot.  Car Music: The Beach Boys (of course). Goal: WE WILL HAVE FUN!


We drive out of the city, to the mountains.  Such a gorgeous day.


 We arrive at Riley's Farm a little after noon.  I reminisce to the boys: "12 years ago, at this very farm, your dad (the Knight) and I came and picked raspberries.  It was one of the best days of my life and we are going to do the very same thing."


The Horseman sets up the picnic blanket.  Me: "This grass is the same grass dad and  I sat after picking raspberries."  Boys: "I need a drink / There's bugs / Can I go to the restroom?"  I tell myself: I WILL HAVE FUN!


We sit down and eat the lovely picnic lunch I had prepared.  My big guy finishes in ten seconds flat. "Can we go home now?" he asks.


"But we've come to pick raspberries," I say.  "And apples," he responds.  "Yes, yes and apples."  WE MIGHT HAVE FUN!


And we start pickin'.  Me: "These are the same raspberries Dad and I picked!"
but...


the Big Guy gets "bored."


The Horseman mysteriously disappears.


They're dropping like flies, but Soda, he's into it.  It's just he and I picking raspberries.  Me lifting the branches: "Soda, look, the mother lode!"  and him eager to pick the dark pink ones, the "squishy" ones going into his mouth.  We are having fun.  Better than that, we are making a memory together.  One now that he'll never forget. Me: are we having fun yet?

 
I start to relax.  The bigger boys are fine traipsing through the fenced-in orchards.  "Everyone has fun in their own way," I tell myself.  A little country experience for my city boys.  Fresh air, stretched out blue skies over the chaparral and oak hills. Seeing where their fruit comes from and in what season. They are learning just by being here, I tell myself.  They are making their own memories, too.


A breeze rustles up the vines and I look around as everything blurs in the breeze.  In the enchantment of the moment my mind goes back to over a decade ago when I was picking raspberries with my soon to be Knight, the thrill of knowing he was watching me, but pretending not to notice, the care-free freedom of being up there with him, before responsibility, before diapers and pee in gatorade bottles, before the permanent dark circles under my eyes...


"WWWAAAAHHHHHH (breathes) WWWAAAAHHHHHH"
This is Horseman crying at the top of his lungs from somewhere yonder in the orchard.  "A bee stung my eye, a bee stung my eye, a bee stung my eye..."  This is why I have permanent dark circles under my eyes.  I calm him down and say, "Let's try to have fun..."


He remedies the situation.


A bee had not really stung his eye.


But he feels more comfortable in the midst of all that wild with a buffer.  Between his eyes and the wild.


After two and half hours in the orchards, we've picked two cartons full of raspberries and a large bag of gala and senshu apples, had a picnic visited the restroom three times and had an incident with a bee. Did we have fun?   The Big Guy is already in the car, seat belt on, ready to go.  "Yeah Mom," he says in between mouthfuls of raspberries. ""We had fun, let's go home now."

September 22, 2010

Tacquito Night with Spanish Rice

Photo by Stephanie Ghiya
At the dinner table, as pertaining to the ritual of dinner, I have tried--for the sake of my future daughter-in-laws--to instill some rule of law.  Forks, knives, napkins.  Namely: MANNERS.  But in order to pull off these fledgling lessons in etiquette, I have to time things just right.  Before I call the dudes in for dinner, the meal, drinks and table have to be ready to go, because, as many of us witnessed in 10th grade English, boys left unto themselves can descend into a Lord of the Flies situation faster than you can text SOS to your husband!

Which brings us to tonight's post.  Tacquito Night is not only tasty, gluten-free and a good use of leftover roast chicken but it means FINGER FOODS!  And as long as my dudes wait for The Good Food Fairy to sit down to the table and a word of grace (as well as keep their feet off the table and out of their food), I don't have to sweat it.


 Take out that left over roast chicken before it joins the ranks of the Lords of the Flies and ...

 Shred it.  Ahhh.  Much nicer.  Set it aside.  Now we'll start the Spanish Rice.


Pour about a tablespoon of Canola oil (or any oil with a high burning point, so not olive) into a large skillet.  Preheat the oil until it shows a shimmer when you tip it in the pan.


Measure out 4 cups of non-msg chicken broth,


Pour the stock into a saucepan and crank on the burner to High.


Now here is your tomato sauce and El Pato or spicy tomato sauce.  Here is where you control the spice for your household.  I use about 1/2 can of each.  You can opt for more spicy (2/3 or even 3/4!! can of El Pato to 1/3 or 1/4!! can of tomato sauce) or less spicy (2/3 can of tom. sauce to 1/3 can of El Pato).  Everything's simpatico as long as the portions from both cans equals one can.  Add the tomato sauce and El Pato to the sauce pan with chicken broth and bring to a simmer.


Add two cups of rice to the oil. 


Stir to coat the rice with the oil. 


Brown the rice.  Some rice grains will be white, some golden and some brown.  Stir and watch.  Stir and watch.


When the Chicken Broth has come to a simmer or in this case a boil,


add the liquid to the rice.  Beware of the steam backlash.  Be careful if your pan is hot like this to only pour a little bit of the chicken stock liquid at a time so you don't get a steam burn.


Put the lid on and lower the heat to LOW.  Simmer for 20 minutes.  Now back to tacquitos...

Add Canola oil to a small skillet, about 1/3 inch deep.  Turn on the burner to Medium heat and preheat  oil.


You will need corn tortillas.  I just love reading such a pure, simple, preservative-free list of ingredients.


Here's the front view...


We need to soften the tortillas and make them roll-able by...


by sliding them into the warm oil, one-by-one.


Let them bathe in the oil between 5 and 10 seconds--just until the tortilla is limp and pliable. 


Remove the tortillas to a platter lined with paper towels.  These will need to cool a bit before you can handle them so turn off the heat under your oil.


To the shredded chicken, add a teaspoon of cumin and ...


a teaspoon of salt. Toss it all up.


Get ready to roll!


Put a large pinch of shredded chicken on one end of the tortilla.


Roll it...


Roll it up, then


Set it aside on your platter or a plate until you've made two per adult and big kids and one per little kid.  Preheat your skillet of oil for three to five minutes over medium heat.


Arrange the tacquitos in your skillet snugly.


Check the rice.  It should be fluffy and beautiful.  Turn off the heat and put the lid back on for a few minutes to rehydrate the rice that got stuck to the bottom of the pan.


Turn the tacquitos a quarter turn after five to seven minutes.  Check and make sure the side coming out of the oil is golden and at the level of crunchiness your heart desires.


Remove the tacquitos to your platter lined with fresh paper towels.  


Give the rice a stir and serve it all up with whatever you fancy (or happened to have in the cupboards): guacamole, pico de gallo, shredded cheese, black beans, refried beans, diced tomatoes, etc.  Enjoy a wistful, manners-policing-free Tacquito Night!

RECIPE: HOMEMADE TACQUITOS
*Gluten Free option

 Prep time: 10 minutes
Cook time: 40 minutes
  • 2 - 3 c. shredded chicken
  • 1      t.  cumin         
  • 1      t.  salt
  • 8 - 12   corn tortillas
  •             canola oil
METHOD
  1. Shred your left over roast chicken and reserve in a bowl.   Add a teaspoon of cumin and a teaspoon of salt to the shredded chicken and toss until combined.
  2. In a 10 inch skillet, preheat a 1/3 inch of canola oil for five minutes over medium heat.
  3. Soften corn tortillas by gently sliding them into the preheated oil, one-by-one, for 5-10 seconds or until very pliable.  Then lay the tortillas aside on a large, paper towel lined plate and let cool.  Turn off the heat under the oil.
  4. When tortillas are cool enough to handle, preheat the same skillet of oil for three to five minutes over medium heat.  Put a large pinch of chicken on one end of a tortilla and roll into a tacquito.  Set tacquito carefully in the oil against one side of the skillet.  Repeat with the other tortillas, lining the tacquitos up snugly against each other so they do not unroll. 
  5. After 5 to 7 minutes, give the tacquito a quarter turn cooking all sides until they are crunchy and golden.
  6. Remove to a platter lined with fresh paper towels.
 RECIPE: SPANISH RICE
*Gluten Free Option
 Prep time: 10 minutes
Cook time: 20 minutes
  • 2 c. long grain white rice
  • 4 c. no-msg chicken broth 
  • 1/2 can tomato sauce
  • 1/2 can El Pato sauce
  • 1 T. Canola oil
 METHOD
  1. Heat canola oil in a large skillet until shimmery.  Add rice.
  2. Stir rice to coat with oil and let rice brown, stirring occasionally.
  3. While rice is browning, bring chicken broth, tomato sauce and El Pato to a low simmer.
  4. Add chicken broth liquid to browned rice and make sure the liquid is at a simmer.  Cover the skillet with lid and turn heat down to low for twenty minutes.
  5. After twenty minutes, check rice.  It should be soft, puffed and fluffy.  Turn off the heat and cover with lid for five minutes to rehydrate rice stuck to the bottom of the pan.
Serving ideas: 1) guacamole, black beans or refried beans, shredded cheese, chopped tomatoes, pico de gallo.